Mastering Classic Chicken Parm: Secrets for Crispy Cutlets & Melty Cheese
Few dishes evoke such universal delight and comfort as a perfectly executed `classic chicken parmesan`. It's a dish that transcends generations and palates, consistently ranking high on everyone's list of comfort food favorites. What makes this Italian-American staple so incredibly addictive? It's that symphony of textures and flavors: the satisfying crunch of a golden-brown cutlet, the succulent juiciness of seasoned chicken, the bright tang of a rich marinara, and the luxurious pull of `melty cheese`. But achieving this harmonious balance, particularly the ideal `crispy cutlets` and truly `melty cheese`, requires a bit of finesse. This guide will unlock the secrets to crafting your own "holy grail" `classic chicken parmesan` that will leave everyone clamoring for more.
The Irresistible Allure of Classic Chicken Parmesan
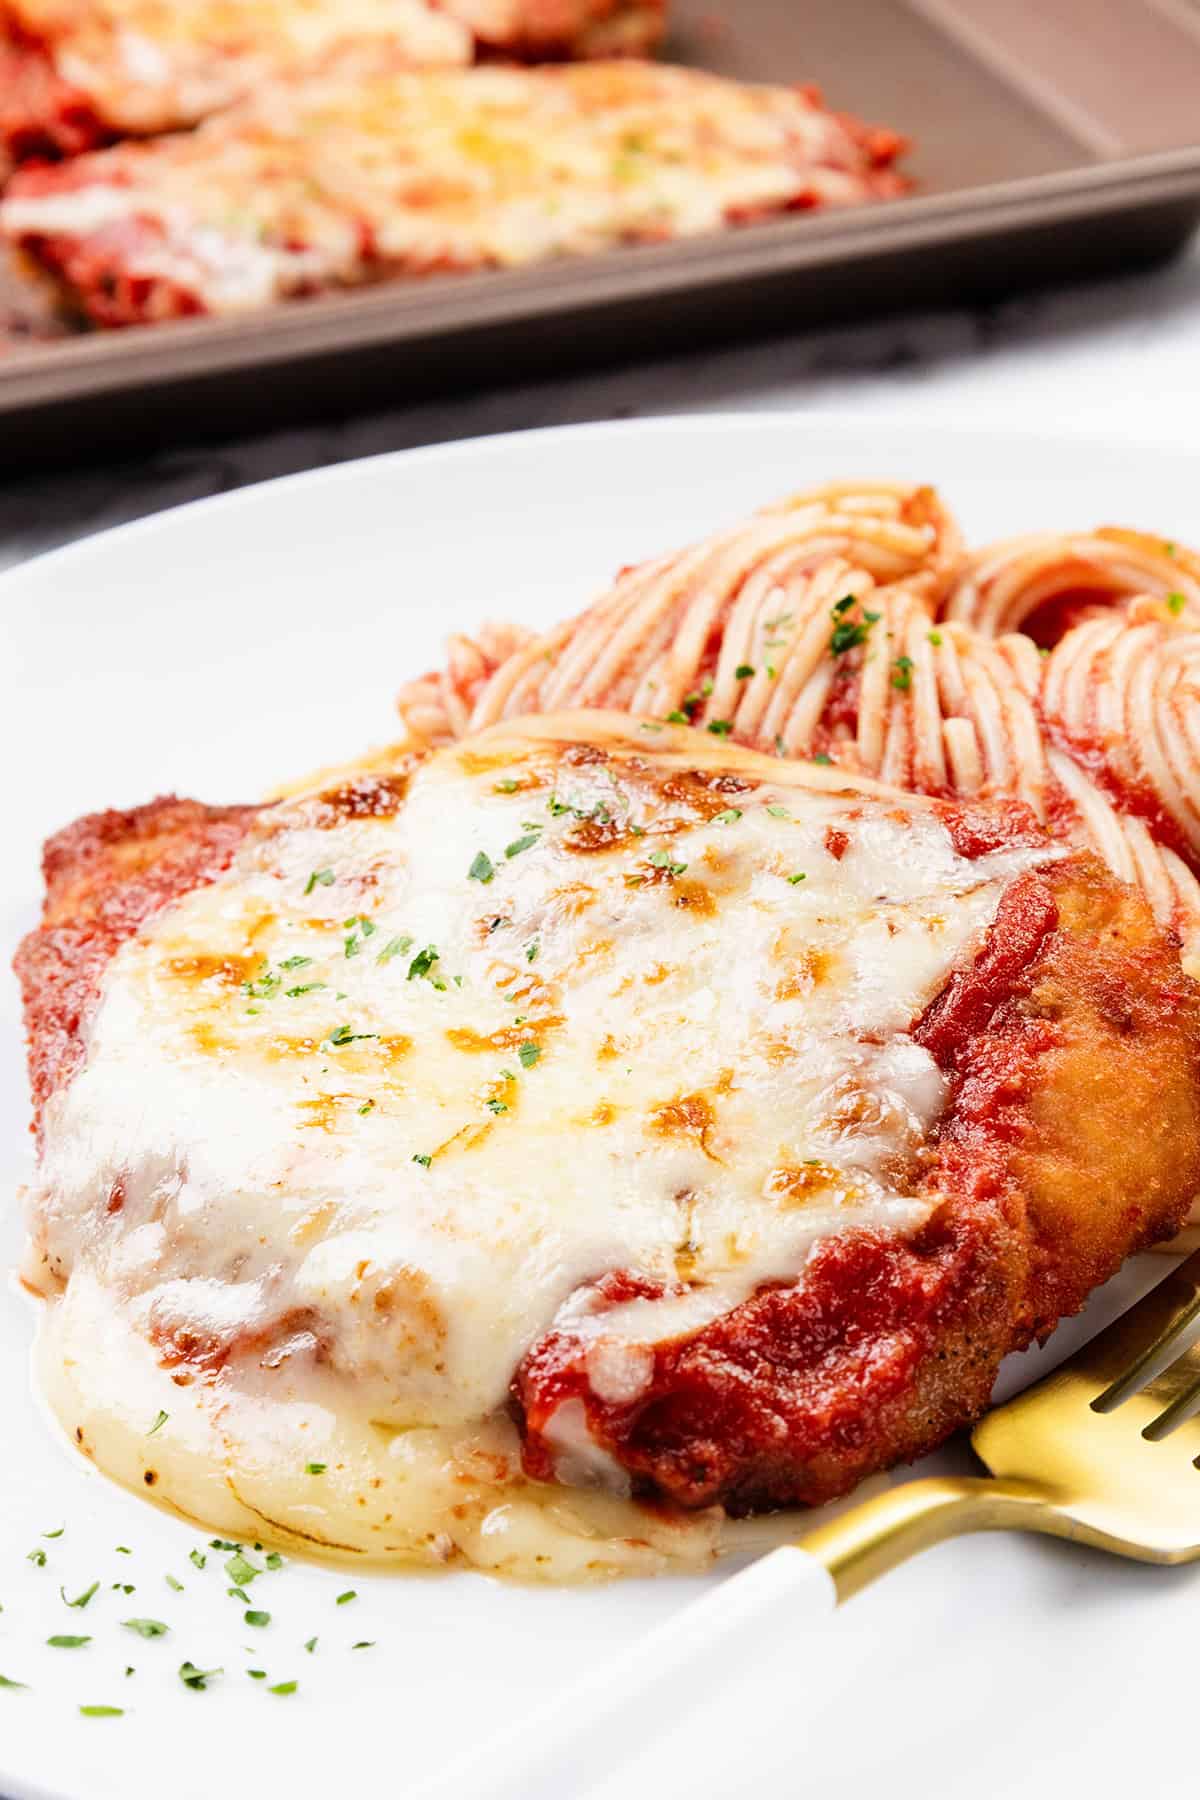
Imagine a plate before you: a substantial, perfectly breaded chicken cutlet, glistening golden-brown from its pan-fried debut. It’s cradled in a vibrant, basil-infused tomato sauce, and crowned with a generous blanket of bubbling, stretchy mozzarella and sharp Parmesan, slightly browned at the edges. One bite reveals everything you crave: that satisfying crunch, giving way to tender, juicy chicken, all enveloped by the savory, slightly sweet sauce and rich, gooey cheese. It's a culinary masterpiece that strikes a rare balance of fatty, umami-rich, crispy, and melt-in-your-mouth textures. This is why `chicken parm` remains the undisputed champion of many dinner tables. For a deeper dive into its universal appeal, explore
Why Chicken Parmesan is the Ultimate Crispy, Cheesy Delight.
Laying the Flavor Foundation: The Marinara Sauce
While the `crispy cutlets` are often the star, a truly exceptional `classic chicken parmesan` starts with a vibrant, flavorful marinara. This is the bedrock upon which all other flavors rest.
*
Homemade vs. Store-Bought: While a high-quality jarred pomodoro or marinara sauce can certainly work in a pinch, making your own from scratch truly elevates the dish. The difference in freshness and depth of flavor is undeniable.
*
Essential Aromatics: Begin by sautéing finely chopped yellow onion and garlic in a generous glug of good quality extra-virgin olive oil. Cook them gently until they are soft, translucent, and sweet – this forms the aromatic base of your sauce. Don't rush this step; it's crucial for developing foundational flavor.
*
The Tomato Choice: Many chefs agree that crushed tomatoes are superior for a `chicken parmesan` sauce. They provide a smooth, slightly sweet base while maintaining a few desirable tomato chunks, offering a more rustic texture than purée.
*
Basil – Stems and All: Fresh basil is non-negotiable for that authentic Italian flavor. Here's a pro tip: don't strip the leaves from the stems. Toss the entire basil sprig, stems included, into your simmering sauce. The stems are packed with essential oils and flavor compounds that will infuse your marinara with incredible fragrance. Simply remove them before serving.
*
Slow Simmer for Depth: Allow your sauce to gently simmer for at least 30-60 minutes. This allows the flavors to meld and deepen, transforming simple ingredients into a rich, complex marinara.
For more insights into creating the perfect accompanying sauce, check out
Crafting the Best Chicken Parm: From Golden Cutlets to Rich Marinara.
Crafting the Perfect Crispy Chicken Cutlets
The crispy, golden-brown chicken is arguably the most defining characteristic of `classic chicken parmesan`. Achieving this requires attention to detail at every step.
*
The Ideal Thickness: The thickness of your chicken cutlets will dictate everything from cooking time to final texture. Aim for a consistent 1/4-inch thickness. If you can't find pre-cut `chicken cutlets`, simply buy boneless, skinless `chicken breasts` and pound them yourself. Place a chicken breast between two layers of plastic wrap or parchment paper and gently use a meat mallet, rolling pin, or the bottom of a small saucepan to pound it evenly to the desired thickness. A slight pounding is all that's needed; you're aiming for evenness, not destruction.
*
The Breading Blueprint: The breading is your crispiness delivery system.
*
Flour First: Dredge the chicken lightly in all-purpose flour seasoned with salt and pepper. This helps the egg wash adhere evenly.
*
Egg Wash: A simple whisked egg (or two) with a splash of milk or water creates the binder for the breadcrumbs.
*
Panko Perfection: This is where the magic happens for `crispy cutlets`. Japanese `Panko` breadcrumbs are significantly flakier and lighter than standard breadcrumbs, resulting in an incomparably crispier, airier coating that absorbs less oil. Don't be shy; use more panko than you think you'll need in your dredging bowl to ensure a thorough, even coating.
*
Parmesan Infusion: To amp up the flavor and richness of the breading, mix finely grated `Parmesan` cheese directly into your panko. This adds a salty, umami kick that complements the chicken beautifully.
*
The Pan-Frying Process:
*
Oil Choice: Forget olive oil for frying the chicken. Its lower smoke point means it can burn easily and impart an undesirable flavor. Instead, opt for a neutral oil with a high smoke point, such as vegetable, canola, or grapeseed oil.
*
Temperature Control: Heat about 1/2 inch of oil in a large skillet over medium-high heat. You want the oil hot enough to sizzle immediately when the chicken hits it, but not so hot that the breading burns before the chicken cooks. Test with a small piece of breading; it should sizzle gently.
*
Don't Overcrowd: Fry the cutlets in batches, leaving plenty of space between each piece. Overcrowding the pan lowers the oil temperature, leading to greasy, less crispy chicken. Fry for 3-4 minutes per side, until deeply `golden-brown` and cooked through (the internal temperature should reach 165°F or 74°C). Drain on a wire rack set over paper towels.
The Melty Heart: Achieving Oozing Cheese Perfection
The luscious, `melty cheese` layer is the crown jewel of `classic chicken parmesan`. This isn't a step to skimp on.
*
Freshly Shredded Mozzarella is Key: This is perhaps the most important tip for optimal melt. Pre-shredded `mozzarella` contains anti-caking agents (like cellulose) that prevent it from clumping in the bag, but they also inhibit its ability to melt smoothly and beautifully. Invest the extra few minutes to grate a block of whole-milk low-moisture mozzarella yourself. The difference in melt-ability, texture, and flavor is monumental – you deserve the cheesiest, meltiest `chicken parm` possible.
*
The Parmesan Power-Up: In addition to the mozzarella, incorporate freshly grated `Parmesan` cheese into your cheese blend. It adds a crucial layer of salty, nutty depth and helps to achieve that slight golden crispiness on top as it bakes.
Assembly, Baking, and Serving Your Masterpiece
With your golden `crispy cutlets` and rich marinara ready, it's time to bring it all together.
*
Layering Logic: Ladle a thin layer of marinara sauce onto the bottom of a baking dish. Arrange your pan-fried chicken cutlets over the sauce. Spoon more marinara over each cutlet, then generously pile on your freshly shredded `mozzarella` and `Parmesan` mixture.
*
The Bake: Bake in a preheated oven (typically around 375°F or 190°C) for 15-20 minutes, or until the cheese is bubbling, golden, and beautifully melted. A brief broil at the end can add extra browning to the cheese, but watch it carefully to prevent burning.
*
Serving: Allow the `chicken parmesan` to rest for a few minutes before serving to let the flavors settle. It's fantastic served with a side of pasta tossed with extra marinara, a fresh green salad, or simply with crusty bread for soaking up every drop of that delicious sauce.
Expert Tips for Chicken Parmesan Perfection
*
Season at Every Step: Ensure your flour, egg wash, and panko mixture are all seasoned with salt and pepper. This builds flavor throughout the dish.
*
Rest the Breaded Chicken: After breading, let the chicken cutlets rest on a wire rack for 10-15 minutes. This allows the breading to adhere better, reducing the chance of it flaking off during frying.
*
Don't Over-Sauce: While a rich marinara is essential, too much sauce can make your crispy cutlets soggy. A moderate amount on the bottom and a generous but not overwhelming spooning over the top is ideal.
*
Garnish Matters: A final sprinkling of fresh chopped basil or parsley just before serving adds a burst of freshness and visual appeal.
*
Make Ahead Option: You can prepare the sauce and pan-fry the chicken cutlets in advance. Store them separately in the refrigerator. Assemble and bake just before serving for the freshest result.
Conclusion
Creating `classic chicken parmesan` from scratch is a deeply rewarding culinary experience. By understanding the nuances of each component – from the sweet, tangy marinara to the flawlessly `crispy cutlets` and the luxurious stretch of `melty cheese` – you can elevate this beloved dish from good to absolutely unforgettable. Embrace these secrets, experiment with the process, and soon you'll be serving a homemade `chicken parm` that truly is the "holy grail" of comfort food. Enjoy the journey to mastering your very own perfect `classic chicken parmesan`!